- Tree Frog
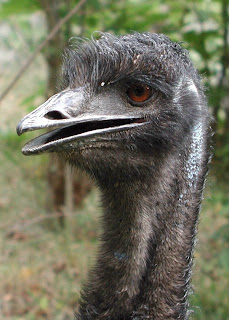
This is the 'Background' of the project. Basically this just means that it's like the base that I'm going to use to build on top of. I will enhance the eyes through the Emu's head. I will do this through the mask that I will create right at the beginning of the project, than after i drag the image on top of the frog, re-size and change opacity to half. I will than use the eraser to 'clean' off any unwanted or excess head.

The Emu at the beginning of the project needs to be rotated horizontally. It will than be selected and dragged over to the frog and place on-top of it. Than the opacity is taken down and the eyes of the emu need to be on top of the Frog's than erased on the mask that is than made. Eventually when you are happy with the product the opacity is turned up to 100%. Than the next step is to duplicate the layers twice (2) and label them 'beak' and 'head'. On each layer the opposite part of the head will need to be erased. For example the beak layer will need to have erased the head but leave the beak. Than the hue/saturation may be changed to whatever colour is desired.
Techniques used are:
- combining images
- resize
- mask
- apple t (select/re-size)
- layers
- apple u (hue/saturation)
- colour and hue
This is my final product. NOT perfect...


Haha,
ReplyDeletevery good Treemu :)
x